Setting up and disabling proxies on Windows 11, 10, 8, 7
Proxy setting on Windows 11
How to disable proxy on Windows 11
Proxy setting on Windows 10
How to connect Windows 10 proxy
How to disable proxy on Windows 10
How to set up a proxy on Windows 8
How to disable proxy on Windows 8
How to connect a proxy on Windows 7
How to disable proxy on Windows 7
Proxy servers for the Windows operating system provide a number of benefits and capabilities. Here are the main ones:
- Anonymity;
- Content unlocking;
- Improved speed and performance;
- Filtering and access control;
- Safety;
- Traffic redirection.
Proxy setting on Windows 11
The developers of this OS version have made Windows 11 proxy settings accessible to all users, regardless of their level of expertise. To begin using proxy servers, simply follow these straightforward steps in the settings:
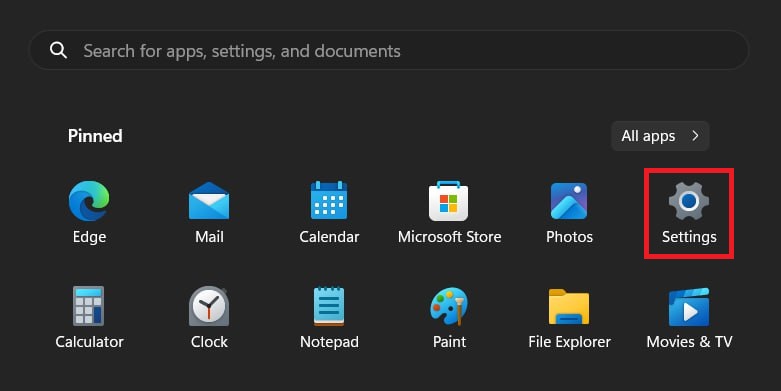
- Firstly, click on the "Start Menu" button in Windows 11 and navigate to "Settings";
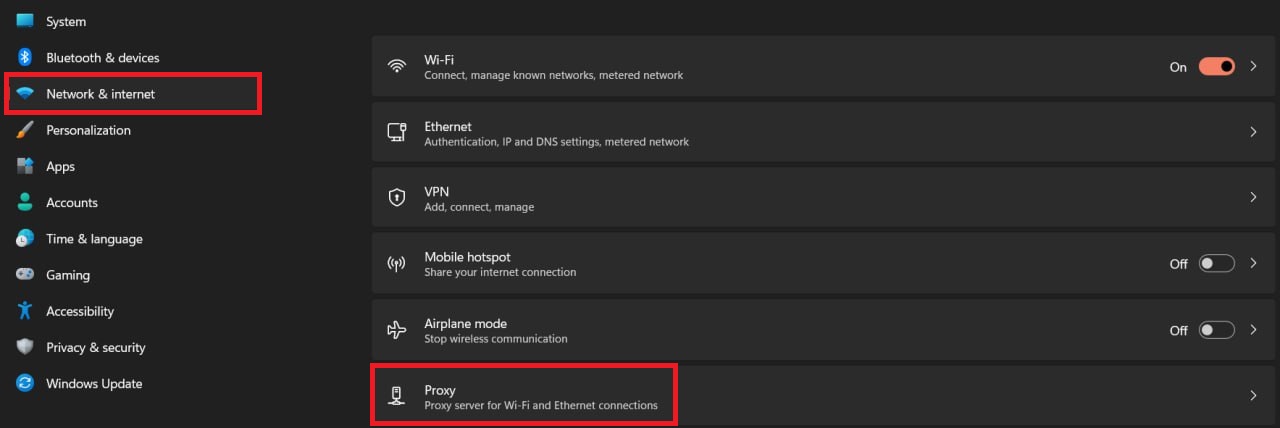
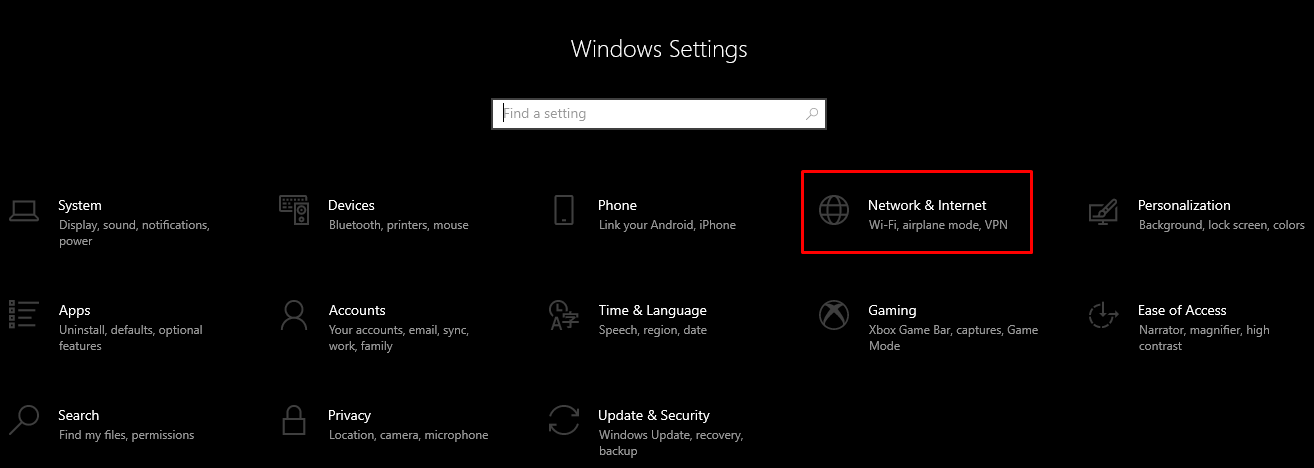
- Next, within the "System" menu category, select "Network and Internet". In the main window section on the right, choose the "Proxy server" submenu;
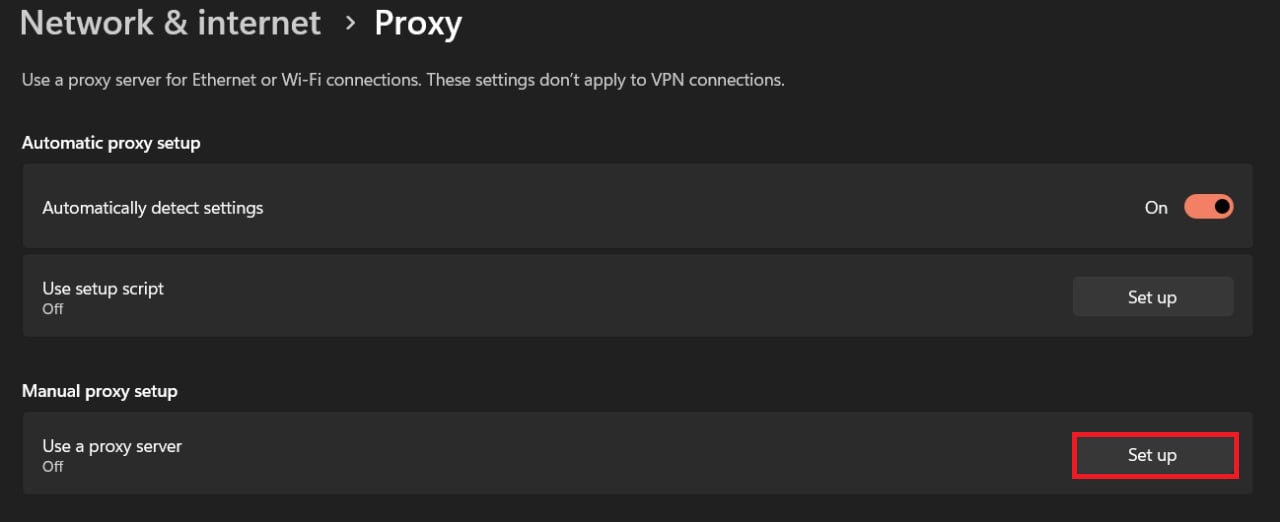
- Proceed to configure the proxy settings manually by clicking on the "Change" button;
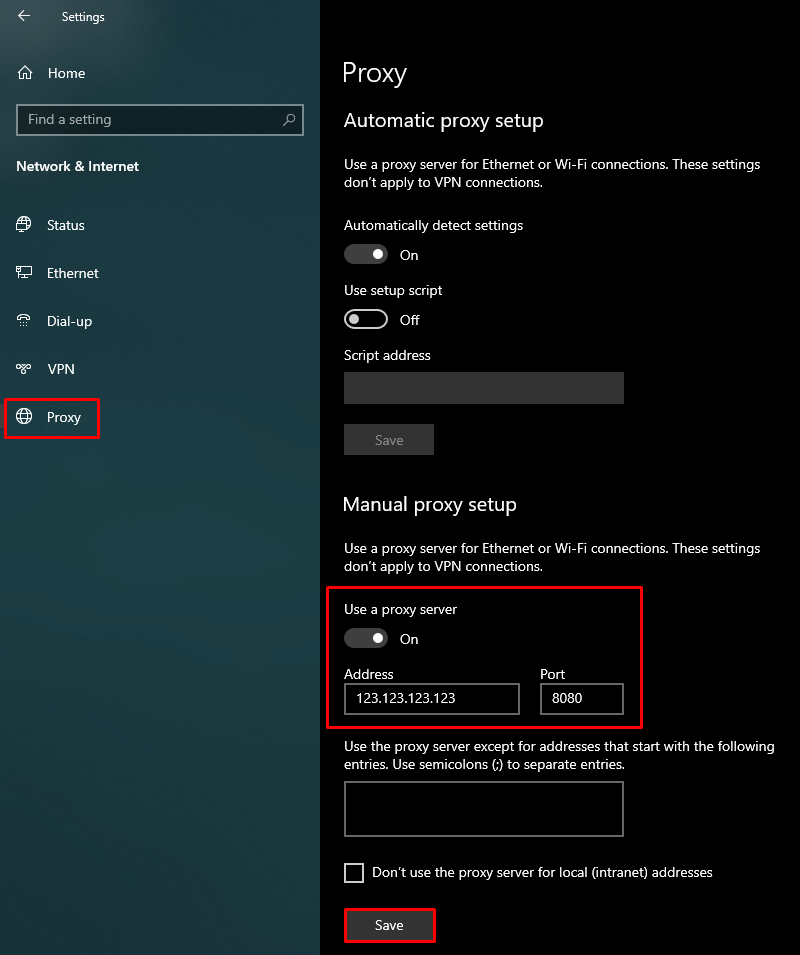
- Enable the "Use a proxy server" toggle switch and input the proxy server parameters provided by your proxy service into the "Proxy server IP address" and "Port" fields. If you wish to use your actual IP address for accessing your internal network, tick the box labeled "Do not use a proxy server for local (internal) addresses". To activate the added proxy, click on the "Save" button;

- When launching a browser, certain types of proxies (such as private proxies) may prompt you for a login and password for authorization. Simply enter the required credentials in the corresponding fields.

How to disable proxy on Windows 11
Disabling proxies is a straightforward process, even for users with limited experience. Follow these simple steps:
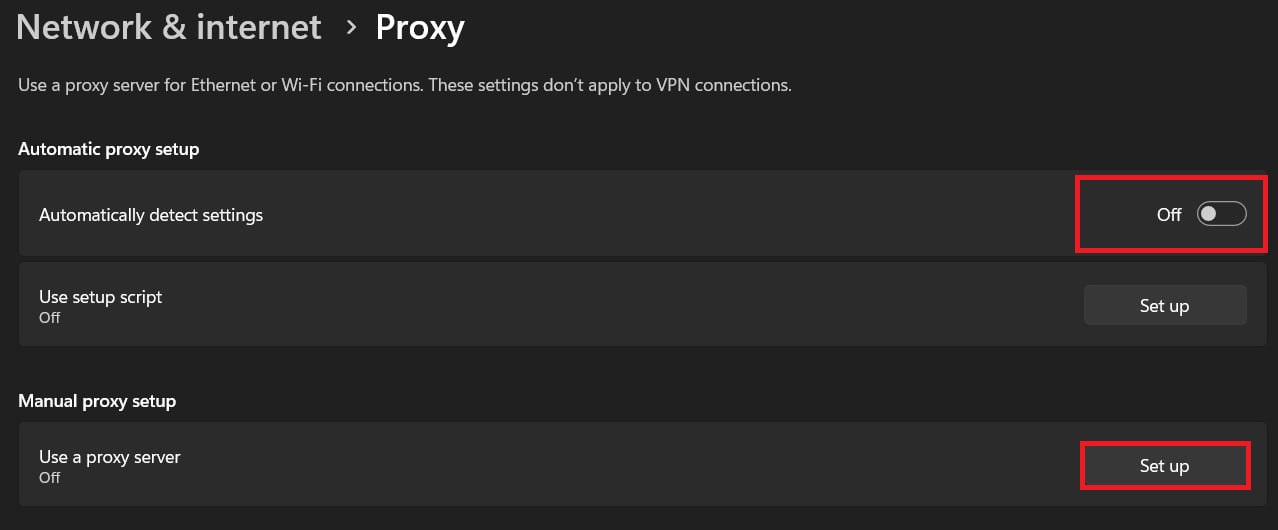
- Access the proxy server settings.
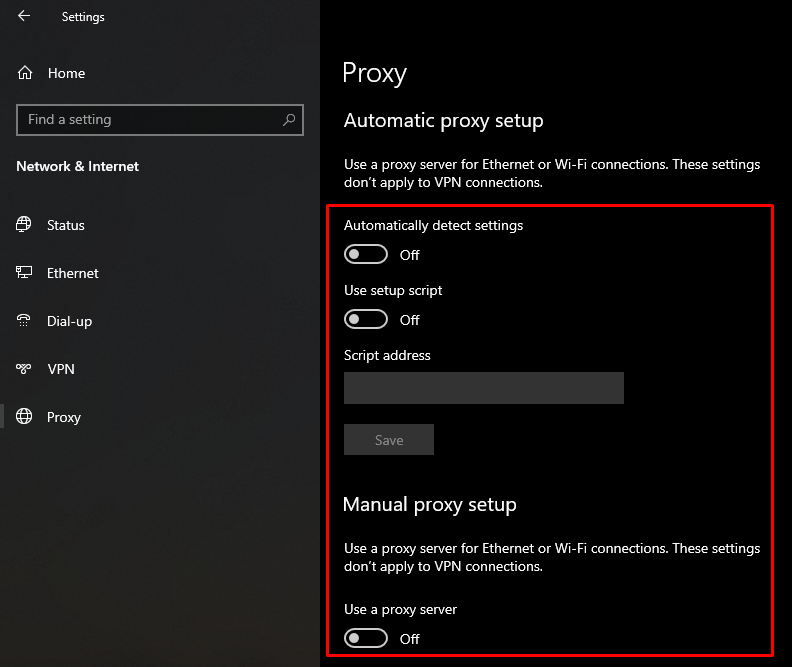
- Turn off automatic proxy settings by disabling the "Detect proxies automatically" option.
- Lastly, navigate to the manual proxy settings and disable its use using a toggle switch. Remember to save the changes made.

Proxy setting on Windows 10
A proxy server on the Windows 10 operating system offers enhanced security and anonymity while browsing the Internet. This tool proves beneficial in resolving professional challenges by minimizing the risk of account blocking. It enables the promotion of multiple social media profiles, data parsing, process automation, and much more. Moreover, it can be advantageous for personal use, granting access to blocked foreign websites. Below, you'll find a detailed step-by-step guide for setting up a proxy server on the Windows 10 operating system. This process can be completed in less than a minute.
How to connect Windows 10 proxy
Method 1 (Windows 10 with Start menu)
- Click the Start menu button and select "Settings" from the main menu. Then, open the "Network and Internet" window.
- In the "Network and Internet" window, use the vertical menu on the left side to choose "Proxy server." Enable the "Use a proxy server" switch. This will allow you to enter the IP address and port of your proxy server in the fields below. Remember to save the changes to enable network access through the configured proxy.

Method 2 (Earlier versions of Windows 10):
- Press the "Win + R" key combination on your PC keyboard.
- In the "Run" window that appears, type "inetcpl.cpl" and press Enter. This will open the Internet Properties window.
- In the Internet Properties window, click on the "Connections" tab.
- On the "Connections" tab, locate the "Network settings" section and click the "Network settings" button.
- In the "Network settings" window, find the "Proxy server" section and check the box next to "Use a proxy server for local connections (these settings will apply to all programs)”.
- Enter the IP address of the proxy server in the "Address" field, and enter the corresponding port in the "Port" field.
- Click the "OK" button to save the proxy server settings.
- After saving the settings, close all open windows.


Now, your Windows 10 operating system is configured with a proxy server. You can safely and anonymously browse the internet. If the proxy server requires authentication, enter the login and password in the appropriate fields when your browser starts.
How to disable proxy on Windows 10
If you need to disable the proxy server, you have two options: one through the "Start Menu" and the other through the command line "Run".
Option 1:
- Open the "Start Menu".
- Select the "Settings" option.
- Navigate to the "Network and Internet" section.
- In the left-side menu of the window, click on "Proxy Server" and deactivate all the switches.
Option 2:
- Press Win + R to open the Run dialog box.
- Type "inetcpl.cpl" in the dialog box and click "OK". This will open the Internet Properties window.
- Go to the "Connections" tab.
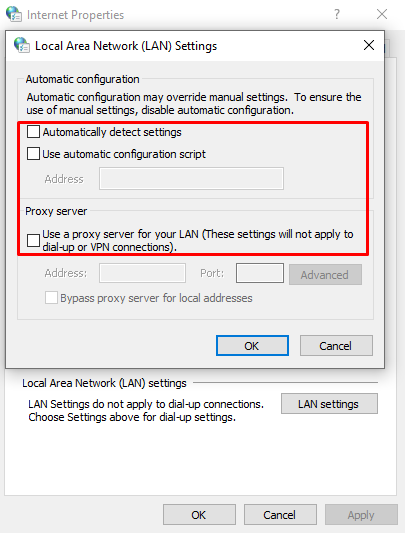
- Click on the "Network settings" button, and in the window that appears, uncheck all the checkboxes.
- Click "OK" to close all the settings windows.
- Once you have disabled the proxy server using either of these options, make sure to close all windows.
How to set up a proxy on Windows 8
To set up a proxy server on your Windows 8.1 operating system, please follow the step-by-step instructions below:
- Access the "Settings" section on your computer's desktop by pressing the "Win + C" key combination. This will open the Charms bar on the right side of the screen. From there, navigate to the desired section to make the necessary changes.
- A window containing computer settings will appear. Select the option "Change computer settings" from within that window.
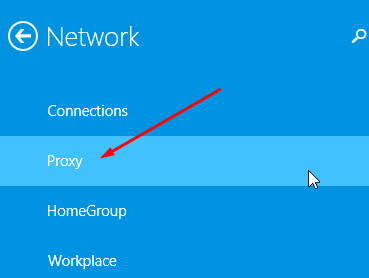
- Within the "Change computer settings" menu, navigate to the "Network" section and then choose the "Proxy" menu item.
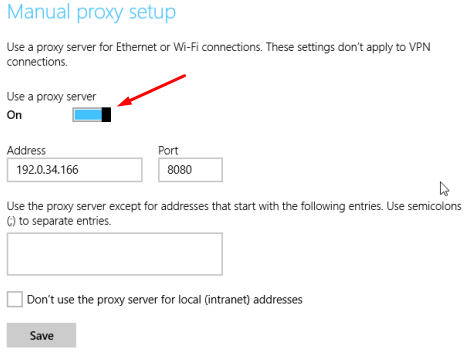
- In the "Manual proxy settings" section, check the box to enable the use of a proxy server.
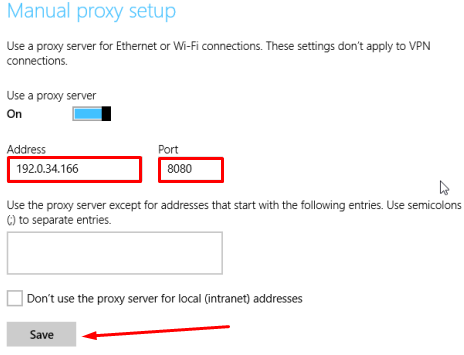
- Enter the IP address and port of the proxy server being used into the appropriate fields. Once you have entered the necessary information, save the changes.


How to disable proxy on Windows 8
If you need to disable the proxy server on your Windows 8 operating system, follow these steps:
- To access the settings, press the key combination Win + C and select the appropriate menu item.
- A window containing computer settings will open. Select the option "Change computer settings" from within that window.
- Within the "Change computer settings" menu, navigate to the "Network" section and then choose the "Proxy" menu item.
- Deactivate the proxy server by disabling the "Use a proxy server" switch.


By following these steps, you can properly set up a proxy server on your Windows 8 operating system, ensuring security and anonymity while browsing the internet.
How to connect a proxy on Windows 7
To set up a proxy server on Windows 7, follow these straightforward steps:
- Open the "Start" menu and select "Control Panel".

- Select "Network and Internet".

- Locate and select the "Internet Options" section.

- In the "Internet Options" window, click on the "Connections" tab, and then select "LAN settings".

- Check the box next to "Use a proxy server for local connections" and then click on the "Advanced" tab.

- Check the box next to "Use the same proxy server for all protocols" and enter your proxy settings, including the IP address and port.

- Click OK to save the changes in all open windows.
After setting up the proxy server, the first time you start your browser, an authorization window may appear. If required, enter your login and password to access the proxy server, and then you can continue using the Internet through the configured proxy.
How to disable proxy on Windows 7
If you no longer need to use a proxy server or encounter issues while using one, such as accessing certain sites or experiencing performance and speed problems, you may need to disable the proxy in Windows 7. This will restore a direct connection to the internet without the intermediary server, potentially resolving any related problems. To disable the proxy in Windows 7, follow these steps:
- Open the "Start" menu and select "Control Panel".
- Select "Network and Internet".
- Locate and select the "Internet Options" section.
- In the "Internet Options" window, click on the "Connections" tab, and then select "LAN settings".
- Remove all the checkmarks or disable any proxy settings that are currently enabled.

Proxy enable and disable settings in Windows 11, 10, 8, and 7 operating systems provide users with control and configuration options for connecting to the internet through a proxy server. These settings allow users to bypass restrictions imposed by internet providers or network administrators, gaining access to previously restricted resources. Additionally, proxies can automate various processes, offering improved efficiency and reducing risks related to data loss or blocking.
Windows proxy settings empower users to customize this functionality based on their needs and preferences when utilizing the internet.
No comments